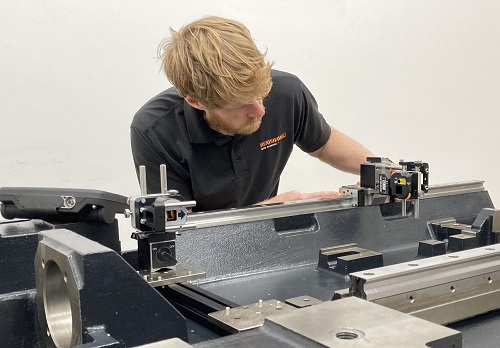
Alignment Lasers For Machine Build
Renishaw’s XK10 alignment laser provides a single digital solution for measuring and adjusting geometric and rotational errors during machine build. This reduces the machine assembly time and optimizes overall performance.
What is an alignment laser?
An alignment laser is a precision tool that utilizes lasers to accurately align components during build and service of industrial machines such as machine tools, precision stages and semiconductor manufacturing machines. Designed to optimize performance, alignment lasers facilitate high-accuracy measurement, digital reporting and real-time axis adjustments.
The increasing demand for intuitive tools to streamline machine alignment processes has outpaced the effectiveness of many traditional methods.
The XK10 alignment laser offers digital precision for aligning both linear and rotary axes, presenting a modern upgrade from traditional manual methods. This leads to a significant reduction in machine build, maintenance and service time.
Why would you use an alignment laser?
It is crucial to ensure precision during construction of a machine tool to make sure that it is reliable and efficient. Checking the alignment during the build process can prevent errors from being discovered after the machine has been built, which can be more difficult to fix. Regular alignment checks are also valuable during on-site service, maintenance or following a collision.
The XK10 alignment laser provides a quick, easy and versatile alternative to traditional methods, like dial gauges, autocollimators and metrology artefacts. It eliminates the need for time-consuming procedures. It can be used to ensure that linear rails are straight, square, flat, parallel and level. It can also assess spindle direction and coaxiality of rotary machines.
The XK10 display unit digitally records measurements, providing comprehensive error reports and reduces operator error due to manual documentation.
System overview
The XK10 launch is the primary laser source for most types of measurement. It is used with the M unit for geometric measurements up to 30 m. The S unit and M unit contain both transmitters and receivers which can be configured in different ways based on the measurement set-up.
The XK10’s machine tool fixturing kit is designed to improve repeatability and accuracy in measurements. Measurements are taken and recorded with the XK10 display unit. This allows up to 30 hours of portable operation with the rechargeable battery.
The straightness and parallelism analysis feature in CARTO Explore creates custom reports. This provides reliable results for checking and correcting machine alignment.
Renishaw can provide calibration training from experienced engineers to ensure optimal product performance.
Key features
- Flexibility – multiple measurements for different machine configurations from a single kit.
- Automatic analysis – immediate measurement results, with live displays for adjustment and easy export to .xml file or CARTO.
- Intuitive software – guides you through the set-up and measurement process, quickly and easily. Visit calibration software downloads for the latest version.
- Wireless connectivity – ensures flexibility within the set up and measurement.
- Easy fixturing – designed for repeatable, accurate results and reduces set-up time.
- Rotating head – allows easy beam pointing from the launch unit with the capability to measure flatness using a series of grid points.
The XK parallelism kit is an additional accessory required to carry out parallelism measurements. It allows two nominally parallel straightness measurements to be carried out without moving the launch.
Accurate – 90° deflection of the laser beam. Versatile adjustments allow ease of alignment.
An optional tripod mount kit is available for use with a tripod when there is no space to directly mount the launch.
Straightness measurement
Measure vertical and horizontal straightness along an axis with the XK10 alignment laser system.
Used during the machine build process to ensure accuracy when mounting and aligning stages and guideways.
Spindle direction measurement
XK10 measures the angle at which a spindle or chuck is pointing.
This can be used for any spindle or chuck alignment, to ensure that it points in the same direction through a full 360° rotation.
#renishaw#modernplasticsindia #modernplasticsasia #plasticsislife #plasticstalk #modernplastics#modernplasticsworld
#pasticsnews #plasticsisgood #plasticsplane#plasticsrecycling#plasticmagazine #plasticIndustry#modernplasticsmiddleeast
#indianmagazine#innovations #modernplasticsamerica #modernplasticsbangladesh #modernplasticsasia #modernplasticsitaly


 English
 Deutsch
 Русский
 Nederlands
 Italiano
 العربية
 עִבְרִית
 Türkçe
 فارسی
فارسی Français
 हिन्दी
 Ελληνικά
 日本語
日本語 简体中文
简体中文 Afrikaans